If you are in the SEO industry then you should be aware that Google is considering SSL (https) domain has a ranking factor. I’m personally not a big fan of Https domains because of many factors.
But, still few of my domains have SSL installed (Premium SSL to be specific) on those for one or the other reason.
There are many SSL certification providers are available online. Most of them are paid one. But in this post, I’m particularly talking about Most Popular and FREE SSL Certificate provider Lets Encrypt.
Most probably you could have heard their name few times by this time. I too heard their name many times, but I didn’t give much attention to it due to my time constraint or lack of interest on SSL.
Recently I was forced to move to a new server so I need to reconfigure my SSL (Premium) certificates. Instead of reconfiguring the old SSL certificates, I thought to give it a try for Lets Encrypt Free SSL provider.
To be frank, Installing and Configuring Lets Encrypt SSL is easier and Faster than any Premium SSL certificate providers.
You may have to spend few minutes to few hours for the first time to understand the SSL setup process. But once you understand, it’s dead easy to replicate on as many domains as you want. Moreover, it’s absolutely Free of the cost! So you don’t need to pay any extra annual renewal fee to continue using it.
I’m not going to show Let’s Encrypt installation for regular Hosting setup i.e., People who directly hosted on any hosting service provider. Because Digital Ocean already has an excellent post showing how to do that.
What I’m going to show here in this post is, How to Configure Let’s Encrypt with CloudFlare setup. I’m sure many SEO’s configured their site with Cloud Flare, so this post is for them.
What You Will Learn:
- How to Download Let’s Encrypt Client
- How to Setup/Validate Let’s Encrypt SSL Certificates with Cloud Flare
- How to Configure Lets Encrypt Certificate with Apache Server
- How to Configure on CloudFlare to Enable SSL/HTTS for Domain
- How to Setup Let’s Encrypt Auto renewal with Cron Job
Things Required for this Guide:
- Ubuntu Server O.S
- Apache Server
- SSH connection to Server
- Sudo Privileges to Execute Commands
- Domain Which is Pointed to Cloud Flare Service
- Knowledge on SSH and Linux Command
How to Install Let’s Encrypt Service on Ubuntu O.S:
Step 1: Install Server Dependence
Before we install free SSL Certificate from Let’s Encrypt, we have to download their tool onto our server. To download Let’s Encrypt client follow the below Guidelines.
As always we have to update ubuntu package manager with the below command.
sudo apt-get update
Now we need Git in order to download Let’s Encrypt Client on our server. To install git, run below command.
sudo apt-get install git
Step 2: Download Let’s Encrypt Client
Now we need to download Let’s Encrypt client on our server. We are going to download Let’s Encrypt client from their official Git repository. To download, execute the below command.
sudo git clone https://github.com/letsencrypt/letsencrypt /opt/letsencrypt
The above command places the Lets encrypt files and Folder (repository) at /opt/letsencrypt. /opt is a standard directory for placing third-party software on Unix system.
Step 3: Setup the Let’s Encrypt SSL Certificates with Cloud Flare
If you are trying default method to install Lets Encrypt SSL certificate to the domain which is using Cloud Flare service, then you will get the below error message. To fix that error we have to follow other method which is method below this error message.
If you are trying with Default Method…
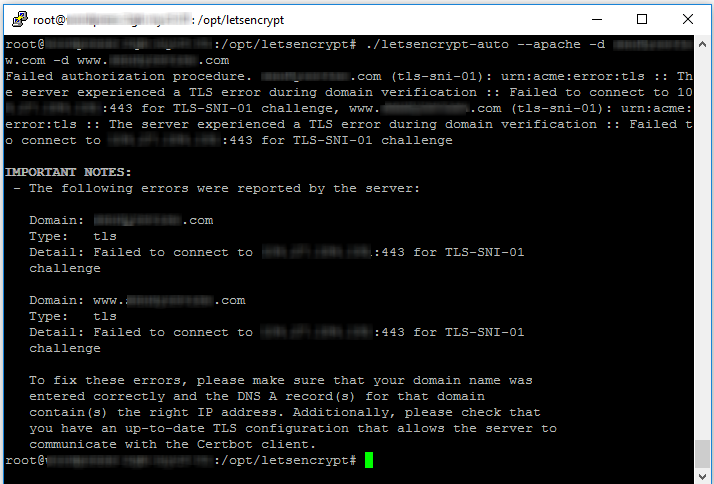
root@myservername:/opt/letsencrypt# ./letsencrypt-auto –apache -d yourdomain.com -d www.yourdomain.com
Failed authorization procedure. yourdomain.com (tls-sni-01): urn:acme:error:tls :: The server experienced a TLS error during domain verification :: Failed to connect to 104.77.177.177:443 for TLS-SNI-01 challenge, www.yourdomain.com (tls-sni-01): urn:acme:error:tls :: The server experienced a TLS error during domain verification :: Failed to connect to 104.77.177.177:443 for TLS-SNI-01 challenge
IMPORTANT NOTES: - The following errors were reported by the server:
Domain: yourdomain.com Type: tls Detail: Failed to connect to 104.77.177.177:443 for TLS-SNI-01 challenge
Domain: www.yourdomain.com Type: tls Detail: Failed to connect to 104.77.177.177:443 for TLS-SNI-01 challenge
To fix these errors, please make sure that your domain name was entered correctly and the DNS A record(s) for that domain contain(s) the right IP address. Additionally, please check that you have an up-to-date TLS configuration that allows the server to communicate with the Certbot client.
root@myservername:/opt/letsencrypt#
This is the step which is a little bit different than digital ocean guide. To install/Generate SSL certificate for your domain which is configured with Cloud Flare CDN service, just follow the below points.
1. Open Let’s Encrpt Directory which we recently downloaded
cd /opt/letsencrypt
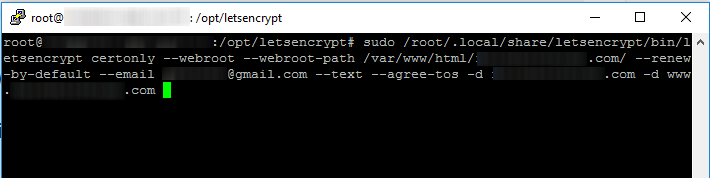
2. If your domain is connected to CloudFlare then we need to use webroot method for verification purpose. To do webroot verification, execute the below command by changing values.
sudo /root/.local/share/letsencrypt/bin/letsencrypt certonly --webroot --webroot-path /var/www/html/yourdomain.com/ --renew-by-default --email [email protected] --text --agree-tos -d yourdomain.com -d www.yourdomain.com
/var/www/html/yourdomain.com/ == Your domain root folder path
[email protected] == Replace with your real email ID
yourdomain.com == Your domain which you need to generate SSL
www.yourdomain.com == www version of your domain which you need to generate SSL
Here the flag’s Explanation
--webroot-path is the directory on your server where your site is located (apache used in the example)
--renew-by-default selects renewal by default when domains are a superset of a previously attained cert
--email is the email used for registration and recovery contact.
--text displays text output
--agree-tos agrees to Let’s Encrypt’s Subscriber Agreement
-d specifies hostnames to add to the SAN. I recommend you to generate a certificate for both www and non-www domain version or else you will face redirection issue on cloud flare.
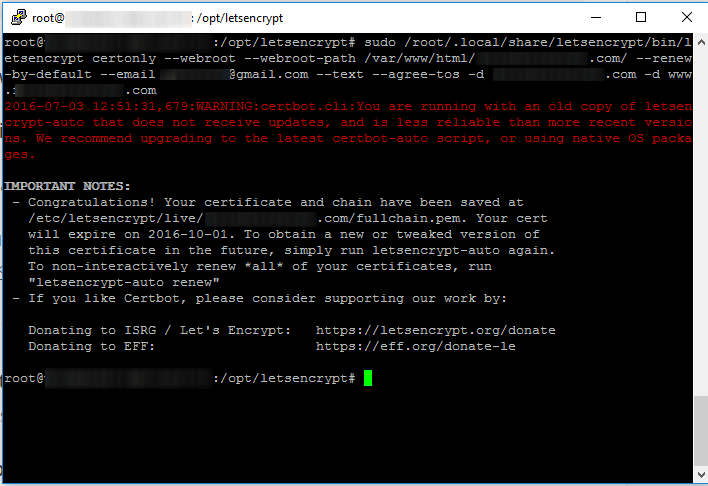
After few seconds of executing that command, you will get below success message. Which is basically saying, your certification generation was successful.
Step 4: Configure Lets Encrypt Certificate with Apache
After generating and validating SSL certificates, it’s time to configure with Apache server. To configure with apache follow below steps.
1. Go to Let’s Encrypt directory
cd /opt/letsencrypt
2. We generated certificates for “yourdomain.com” and “www.yourdomain.com”. To configure SSL for both version domain with apache, run the below command
sudo ./letsencrypt-auto --apache -d yourdomain.com -d www.yourdomain.com

3. You should get a message saying
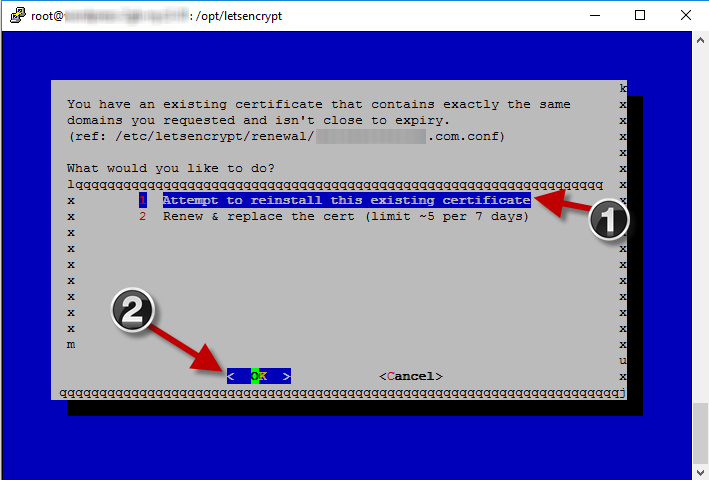
4. Just choose 1’st option i.e., “1. Attempt to reinstall this existing certificate”
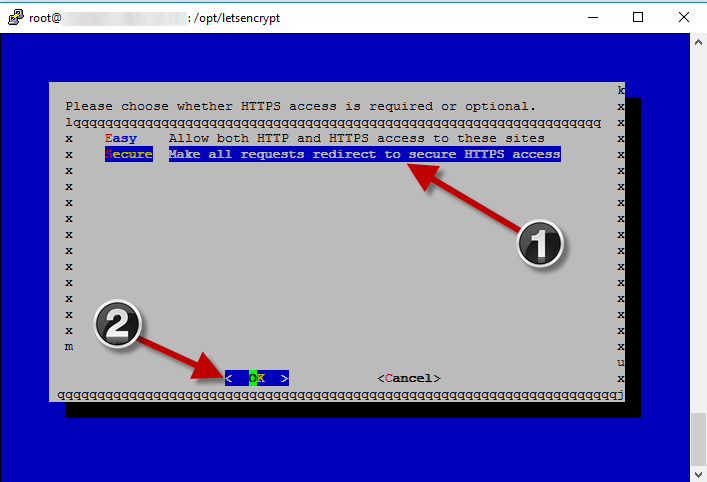
5. In the next screen, you will get an redirect option. I prefer to redirect all my http traffic to https so I selected second option.
Choose “Make all request redirect to secure HTTPS access” and click “OK”
6. In the next screen you will see success message of Lets Encrypt SSL installation.
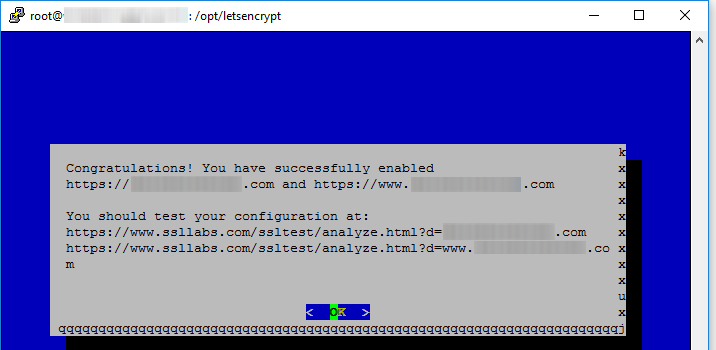
7. If you wish to test to your SSL configuration then visit the URL’s which is provided in the success message.
https://www.ssllabs.com/ssltest/analyze.html?d=yourdomain.com
https://www.ssllabs.com/ssltest/analyze.html?d=www.yourdomain.com
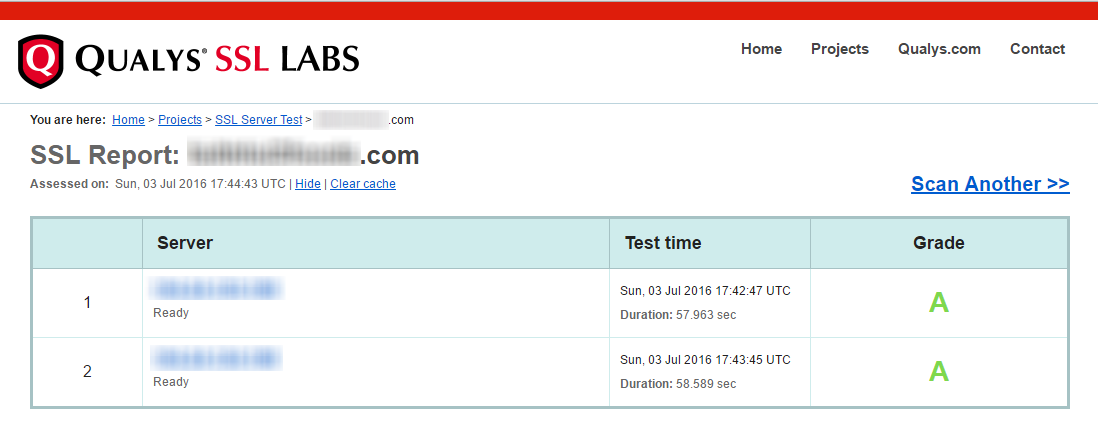
You will see “A” grade for that SSL configuration.
Step 5: Configuring on CloudFlare to Enable SSL/HTTS
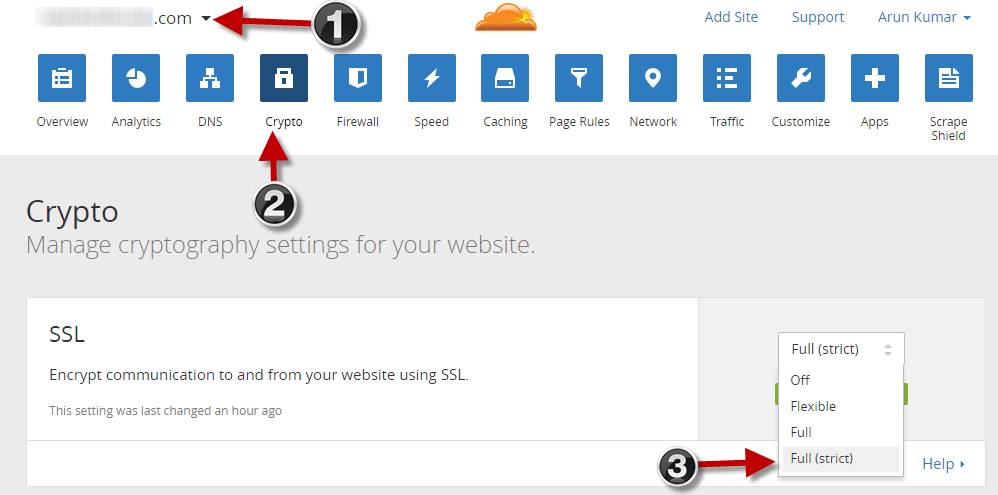
1. Login to your CloudFlare account
2. Choose the Domain and Click on “Crypto” option
3. Here see “SSL” option. Under that you have to choose “Full (strict)” option from the drop down.
Good. Now your site/domain should be using https URL!
Step 6: Setup Let’s Encrypt Auto renewal with Cron Job:
Let’s Encrypt SSL certificate are valid only for 90 days. So every 90 days we need to renew our SSL certificates or else it will expire. Instead of doing manually, we can automate SSL renewal using Cron Job on our server. We can renew certificates only 30 days away from the expiration date.
So we will setup a cron job to run every week to check renewal of SSL. If the certificate is less than 30 days away from expiration, then our cron job will automatically renew the Let’s Encrypt SSL certificates for the domains which you have installed. Is it that cool? ok, run the below command to set auto-renewal of Lets Encrypt SSL for all your domains.
Open crontab by executing below command.
sudo crontab –e
Now copy paste the below command to run let’s encrypt auto renewal cron job.
30 2 \* \* 1 /opt/letsencrypt/letsencrypt-auto renew >> /var/log/le-renew.log
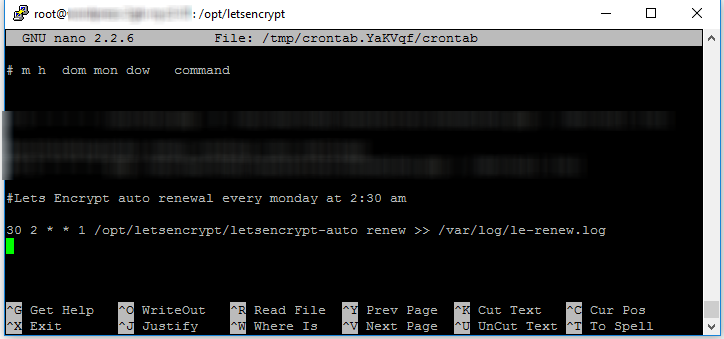
What the above command do is, it tries to run let’s encrypt auto renewal command every Monday 2:30AM and result will be piped to a log file at /var/log/le-renew.log.
That’s it, guys. Now we successfully implemented Let’s Encrypt Free SSL certificates with Cloud Flare and did an auto renewal automation as well. So from now onward you don’t need to pay any extra charges for maintaining SSL certificates.
Update:
If you are using certbot, then you use below command to install certificate using webroot method.
sudo certbot certonly --webroot --agree-tos --email [email protected] -d domain.com -d www.domain.com -w /var/www/html/domain.com/
Cron Job to auto renew certificate daily at 9am.
00 9 \* \* \* sudo certbot renew >> /var/log/certbot-letsencrypt.log
Command to check if renew performs correctly.
sudo certbot renew --dry-run
Conclusion:
If you are one of those who are a fan of SSL or https domain, then I recommend you to try this free Let’s Encrypt SSL certificates. Because it’s free, easy to install and no need to pay any renewal changes and all. Setting up Let’s Encrypt SSL with Cloud Flare is little bit different process than the normal process. Here I covered that method clearly as well. If you are still facing any issue with the setup process, let me know in comments. I will try to answer those if I can.